|
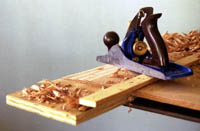
Simple Scarfing Jig |
|
|
At the end of the plank, a line is drawn designating the width
of the scarph. A second line is drawn two scarph widths from
the edge. A spacer board, equal in thickness to the plank (a
scrap of plank material will do), is attached flush with the
second line. Two screws, countersunk below the surface of the
spacer, are driven through the plank and into the work surface,
providing a simple and effective attachment. With the back end
of the plane resting on the spacer, the plank is planed until
a feather edge appears--this yields a scarph with the proper
width and slope. |
|
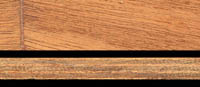
Scarf
Joint, Top and Side Views |
|
|
Easy to find the joint on the top, but not on the side. |
|
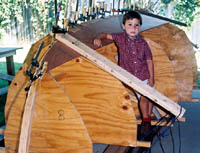
Dad, Will
it Float? |
 |
|
Future sailor, Christopher Aragon Leap, poses alongside a major
construction milestone--the first plank. |
|
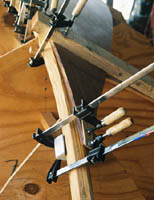
Garboard
#1 Plank Clamped, Twisted, and Glued at the Bow |
|
|
Significant twist in the garboard at the bow is handled easily
with several boards. One end of each board is clamped to the
backbone. The other end is lashed to the strongback with an adjustable
taunt-line hitch. Long lever arms reduce tension in the lines.
Two boards are actually used at each position, sandwiching the
plank and backbone. The bottom board creates an approximately
parallel surface for the lower end of the clamp and protects
the backbone. |
|
Simpler
Garboard #1 Attachment at the Stern. |
|
|
Only one board is used to twist the garboard at the stern. The
two clamps holding the aft end of the garboard against the stem
do the rest |
|
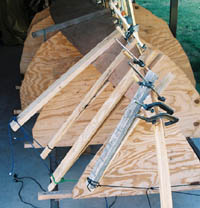
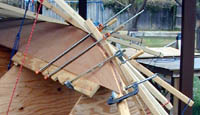
Garboard
#2 Attachment at the Stern |
 |
|
When attaching the second garboard, fewer clamps can be used
along the backbone because the first garboard is in the way.
Long 2 x 4's lashed at each end hold the planks down at each
station mould. Sheet metal screws and fender washers hold planks
against the backbone between stations. Clamps can be used in
the centerboard slot. |
|
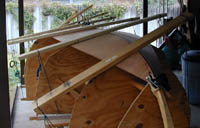
Garboard
#2 Attachment at the Bow |
|
|
A notched board temporarily attached to moulds 1 and 2 provide
convenient clamping points for 2 x 4's used to apply twist in
the garboard at the bow. |
|
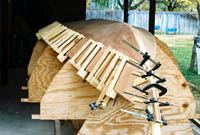
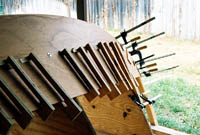
Oughtred's
Plywood Clamps Seen from Bow |
|
|
Oughtred's clamps worked very well! |
|
One Temporary
Screw at Each Station |
|
|
A temporary screw at each station was set during the 'dry fit'
of each plank. This simplified the later positioning of slippery
glued boards. |
|
Half-Planked
Hull Seen From Stern |
|
|
Plank ends are shown nearly planed down to the stem. Battens
are in place for bevelling the plank lands. |
|
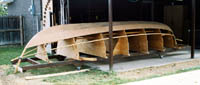
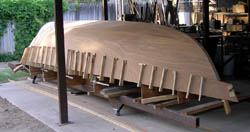
Beginning
to Look Like a Boat |
|
|
The building frame is being pushed off of the concrete slab to
free up the covered work space for another project (daytime job). |
|
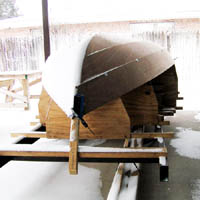
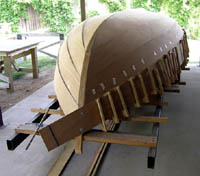
Showing
Her Norwegian Heritage |
|
|
The third pair of planks is dry fit. The weather is not cooperating,
and gluing must wait. (But we are in a drought, so no one is
complaining.) Would the Vikings be proud? |
|
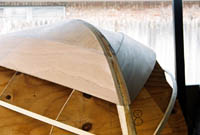
Dry
Fit of First Sheer Strake |
 |
|
Succesive planks are easier to attach because of less twist and
bend towards the sheer...and a little more experience with the
process. |
|
Dry
Fit of Second Sheer Strake--Last Plank! |
 |
|
Another milestone. |
|
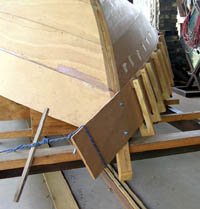
Closeup
of Clamping Mechanism for Last Plank |
 |
|
A Spanish windlass holds the plank end in place while temporary
screws are placed. Indexed strips of masking tape, placed during
the dry fit, mark clamp positions for the final gluing--when
there is no time for fiddling around. |